

Swipe2Pay for Android #
With Swipe2Pay payment authentication mechanism, customers can just swipe on the mobile banking app to authenticate a payment. To enable this mechanism, follow the steps mentioned in this document.
Prerequisite #
Have the following prerequisites ready before you begin with the SDK setup:
- Install or update Android Studio to its latest version
- Make sure your projects meet the following requirement: Target API level 19 (Lollipop) or later
- Set up a physical device or use an emulator to run your app. Emulators must use an emulator image with Google Play.
- Have jitpack and google maven repos added to your project gradle.
- Cipher 3DS SDK is built on top of Apollo Framework. Use this doc for instructions on managing the SDK authentication using the JWT. Henceforth, this will be referred to as tenantAuthToken
- You have the username and password handy for accessing the SDK artifacts from our maven repo.
- You have the cipher.json config file shared with you.
- You use Java 8 or above
- You have databinding enabled for your Android Project
- Firebase setup: Set up a
Firebase project for your app and register your Cloud Messaging server key in our dashboard.
Step 1: Create a Project #
You can create a Project from the App Center. Link to App Center is unique to each ACS customer and you should have it as part of the onboarding process.
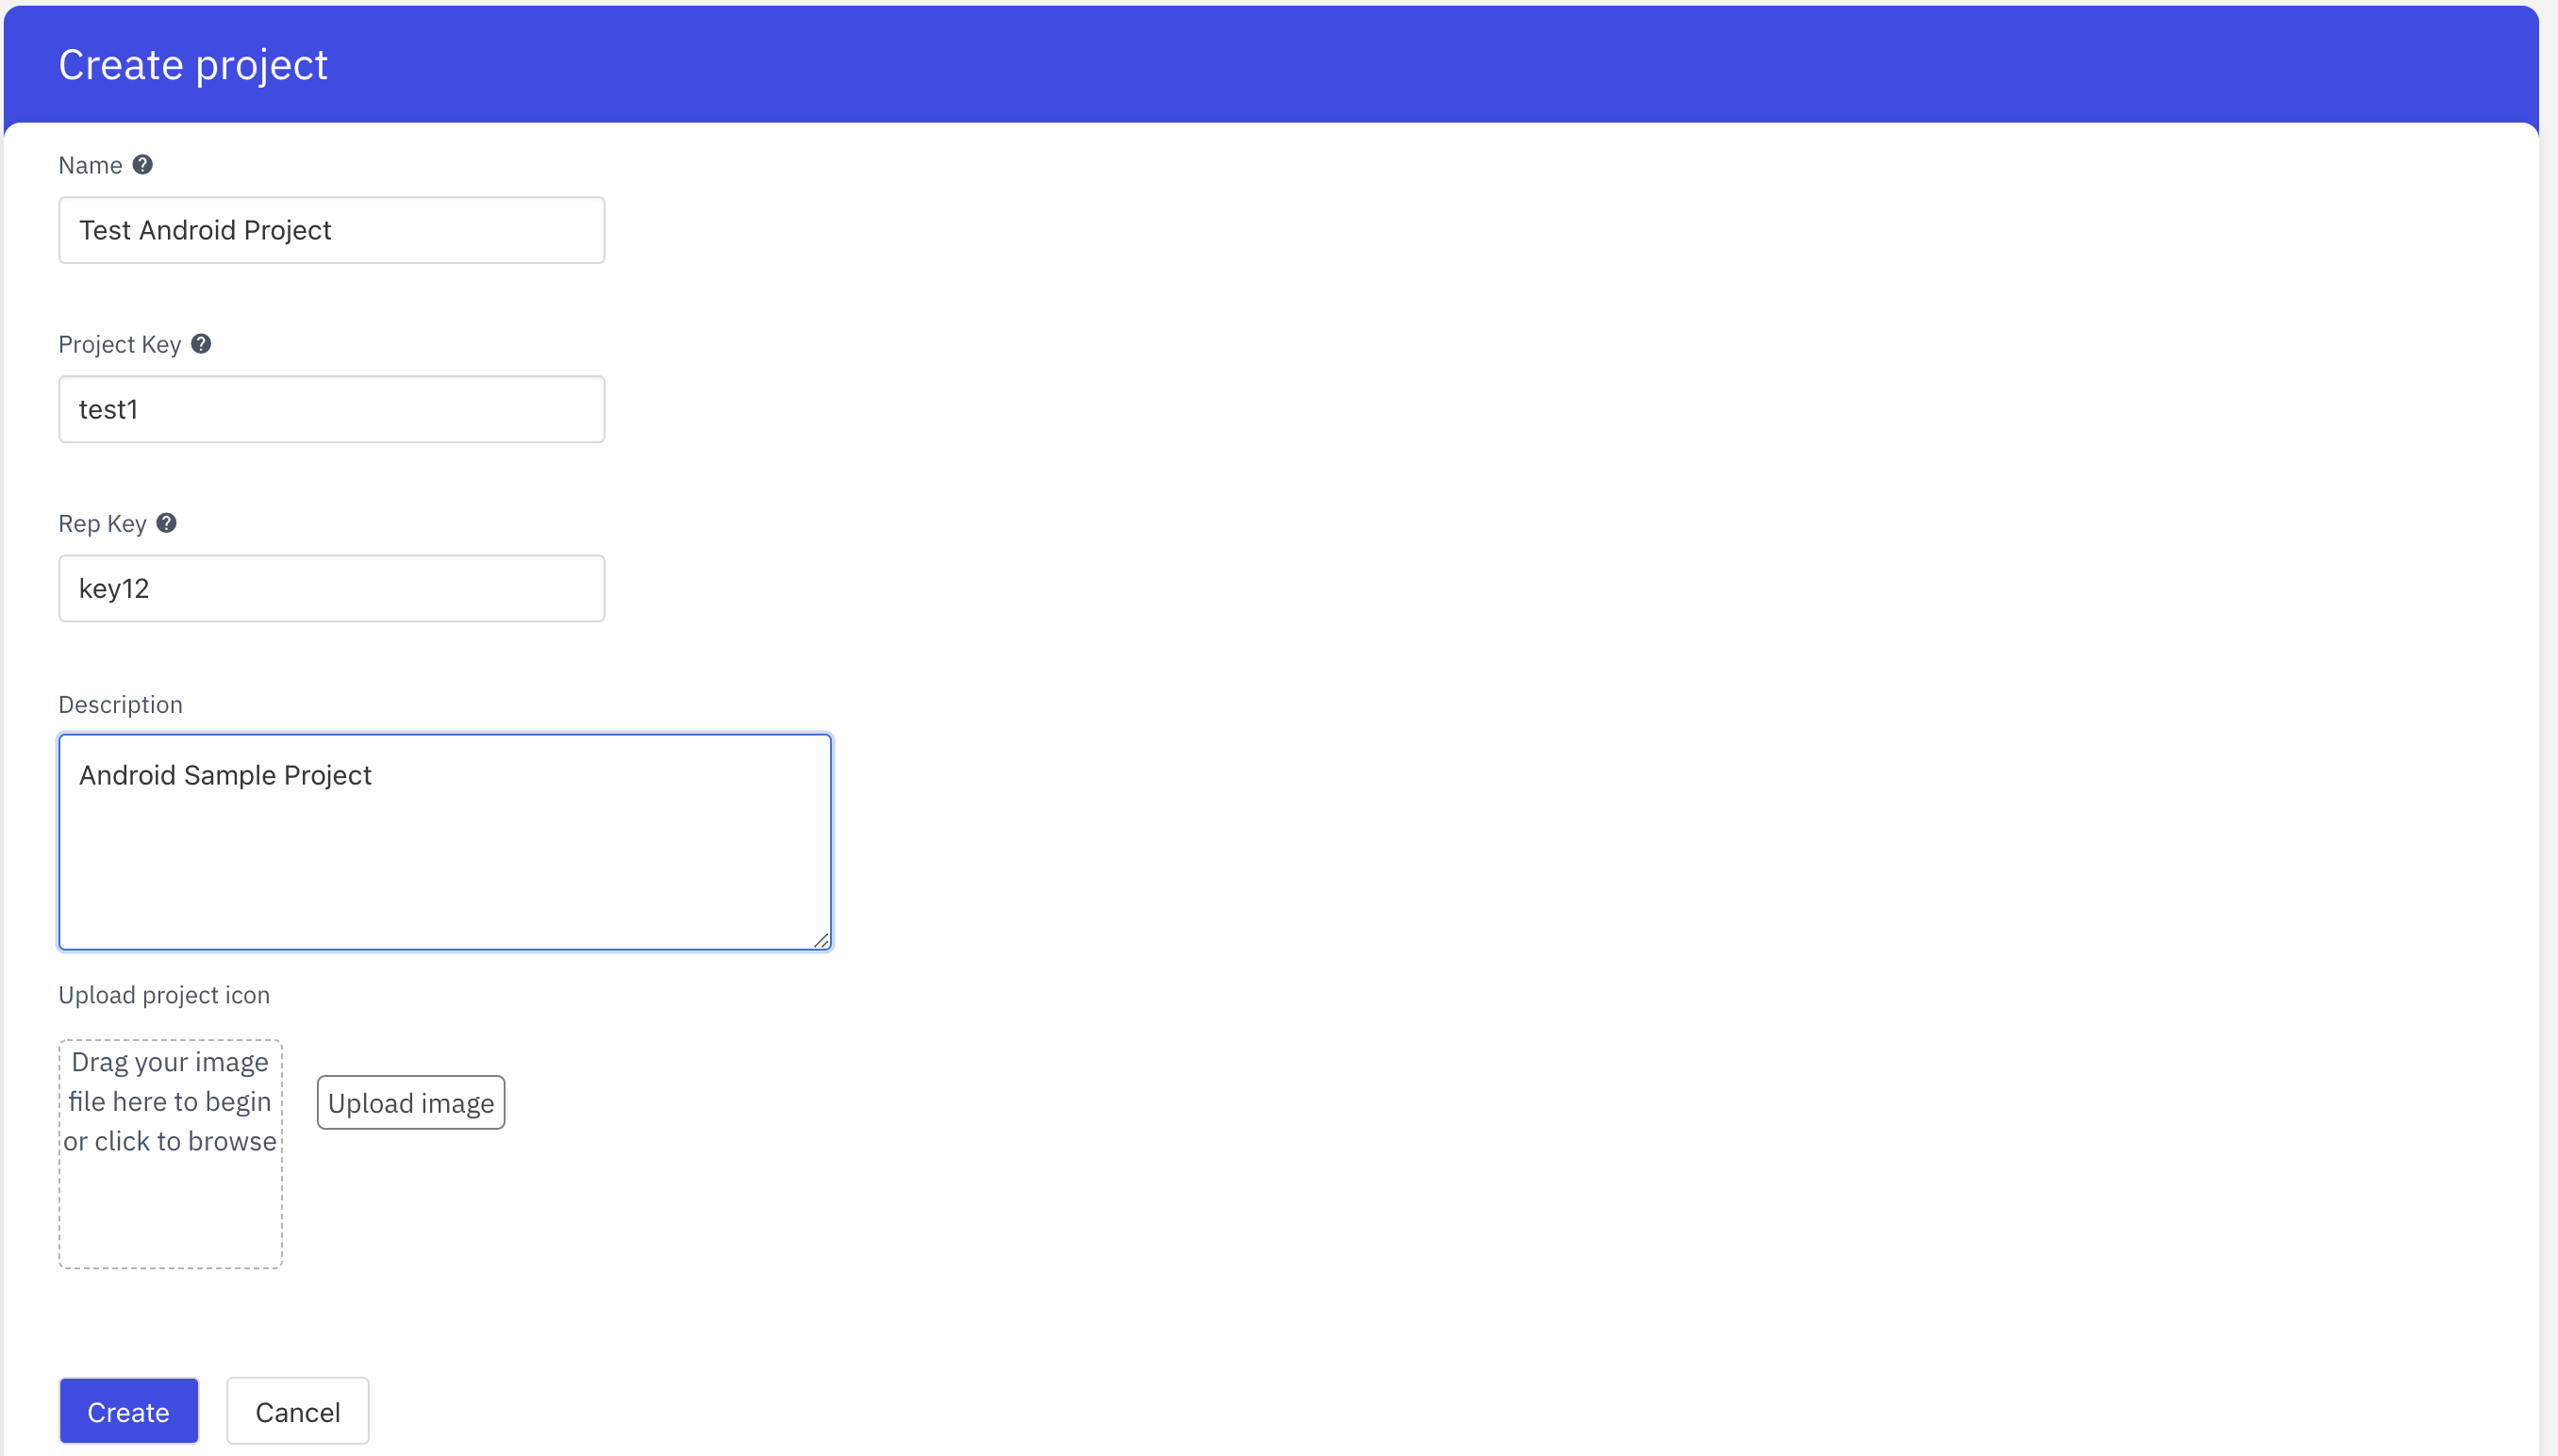
In order to create a Project, the following details are required:
- Name
- Project Key
- Rep key
- Description
- Icon
Name is a general-purpose display name of the project through which you can refer to the project. Project Key acts as a unique identifier of a project. There will never be two projects with the same project key. Rep Key is the unique key belonging to the repo you downloaded.
Step 2: Creation of an Application #
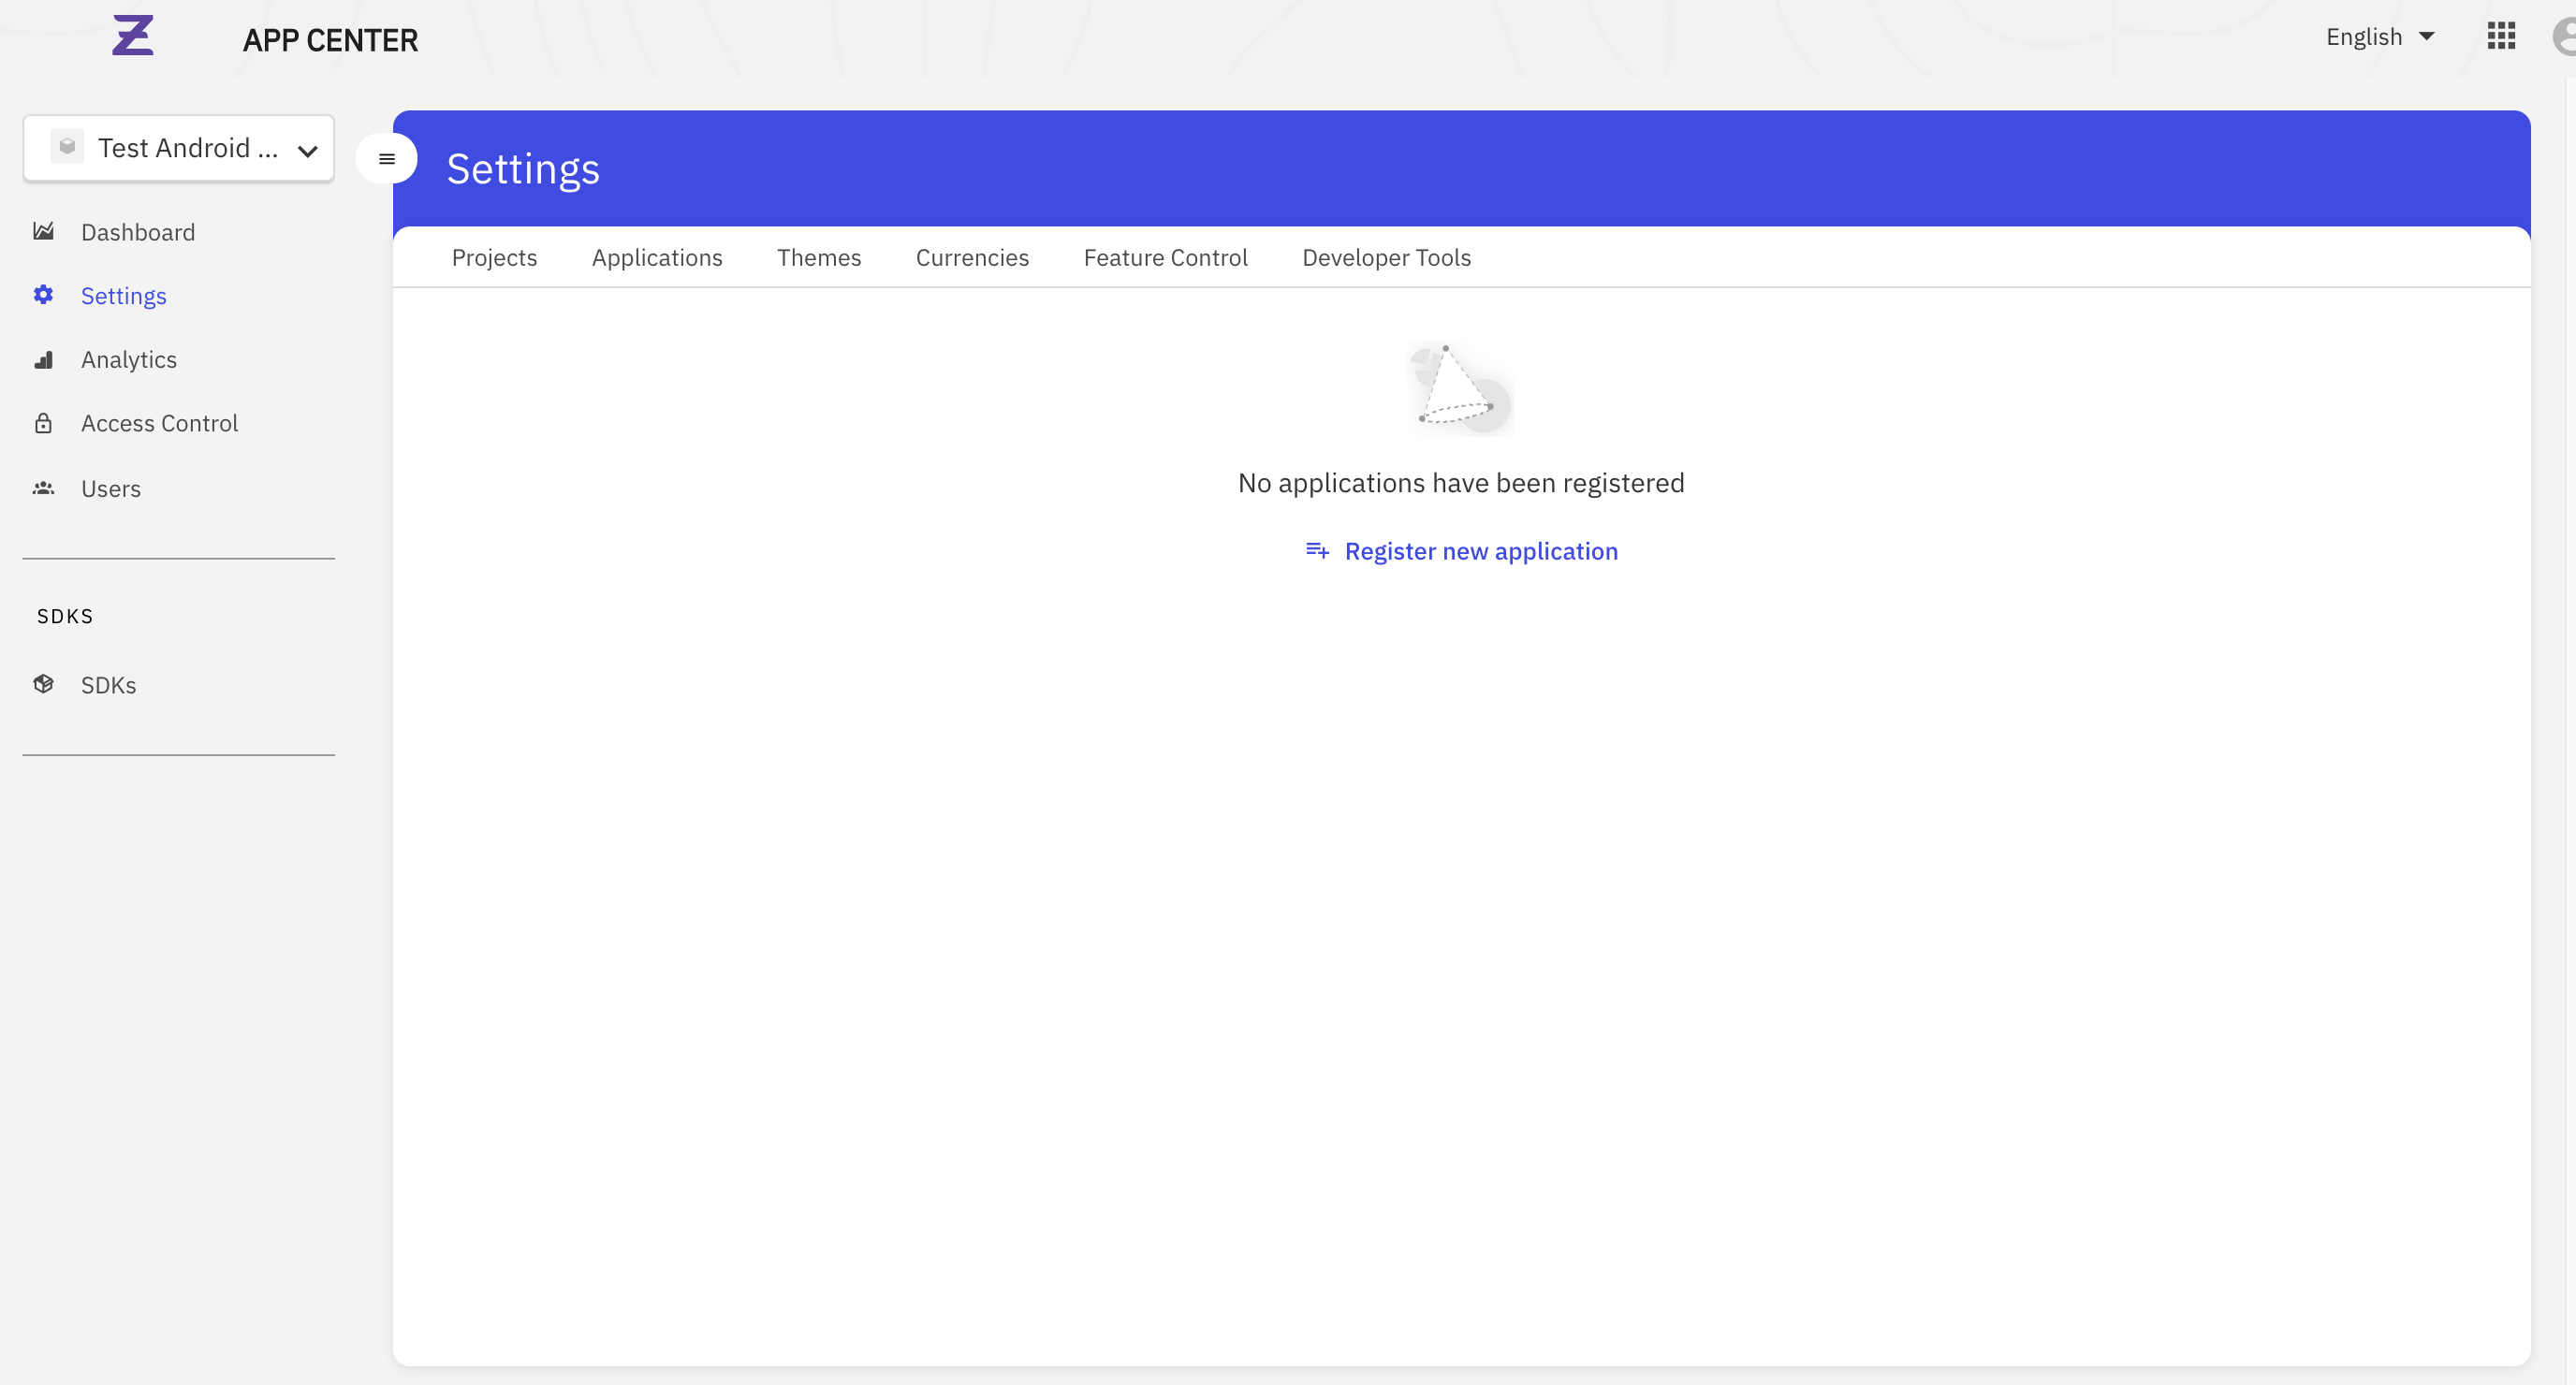
Once you create a project, the next step would be to create an application for your project. Within a project, you can register one application per platform (Android or iOS). You can register your application by clicking on Settings on the left Menu and then navigating to the Applications tab.
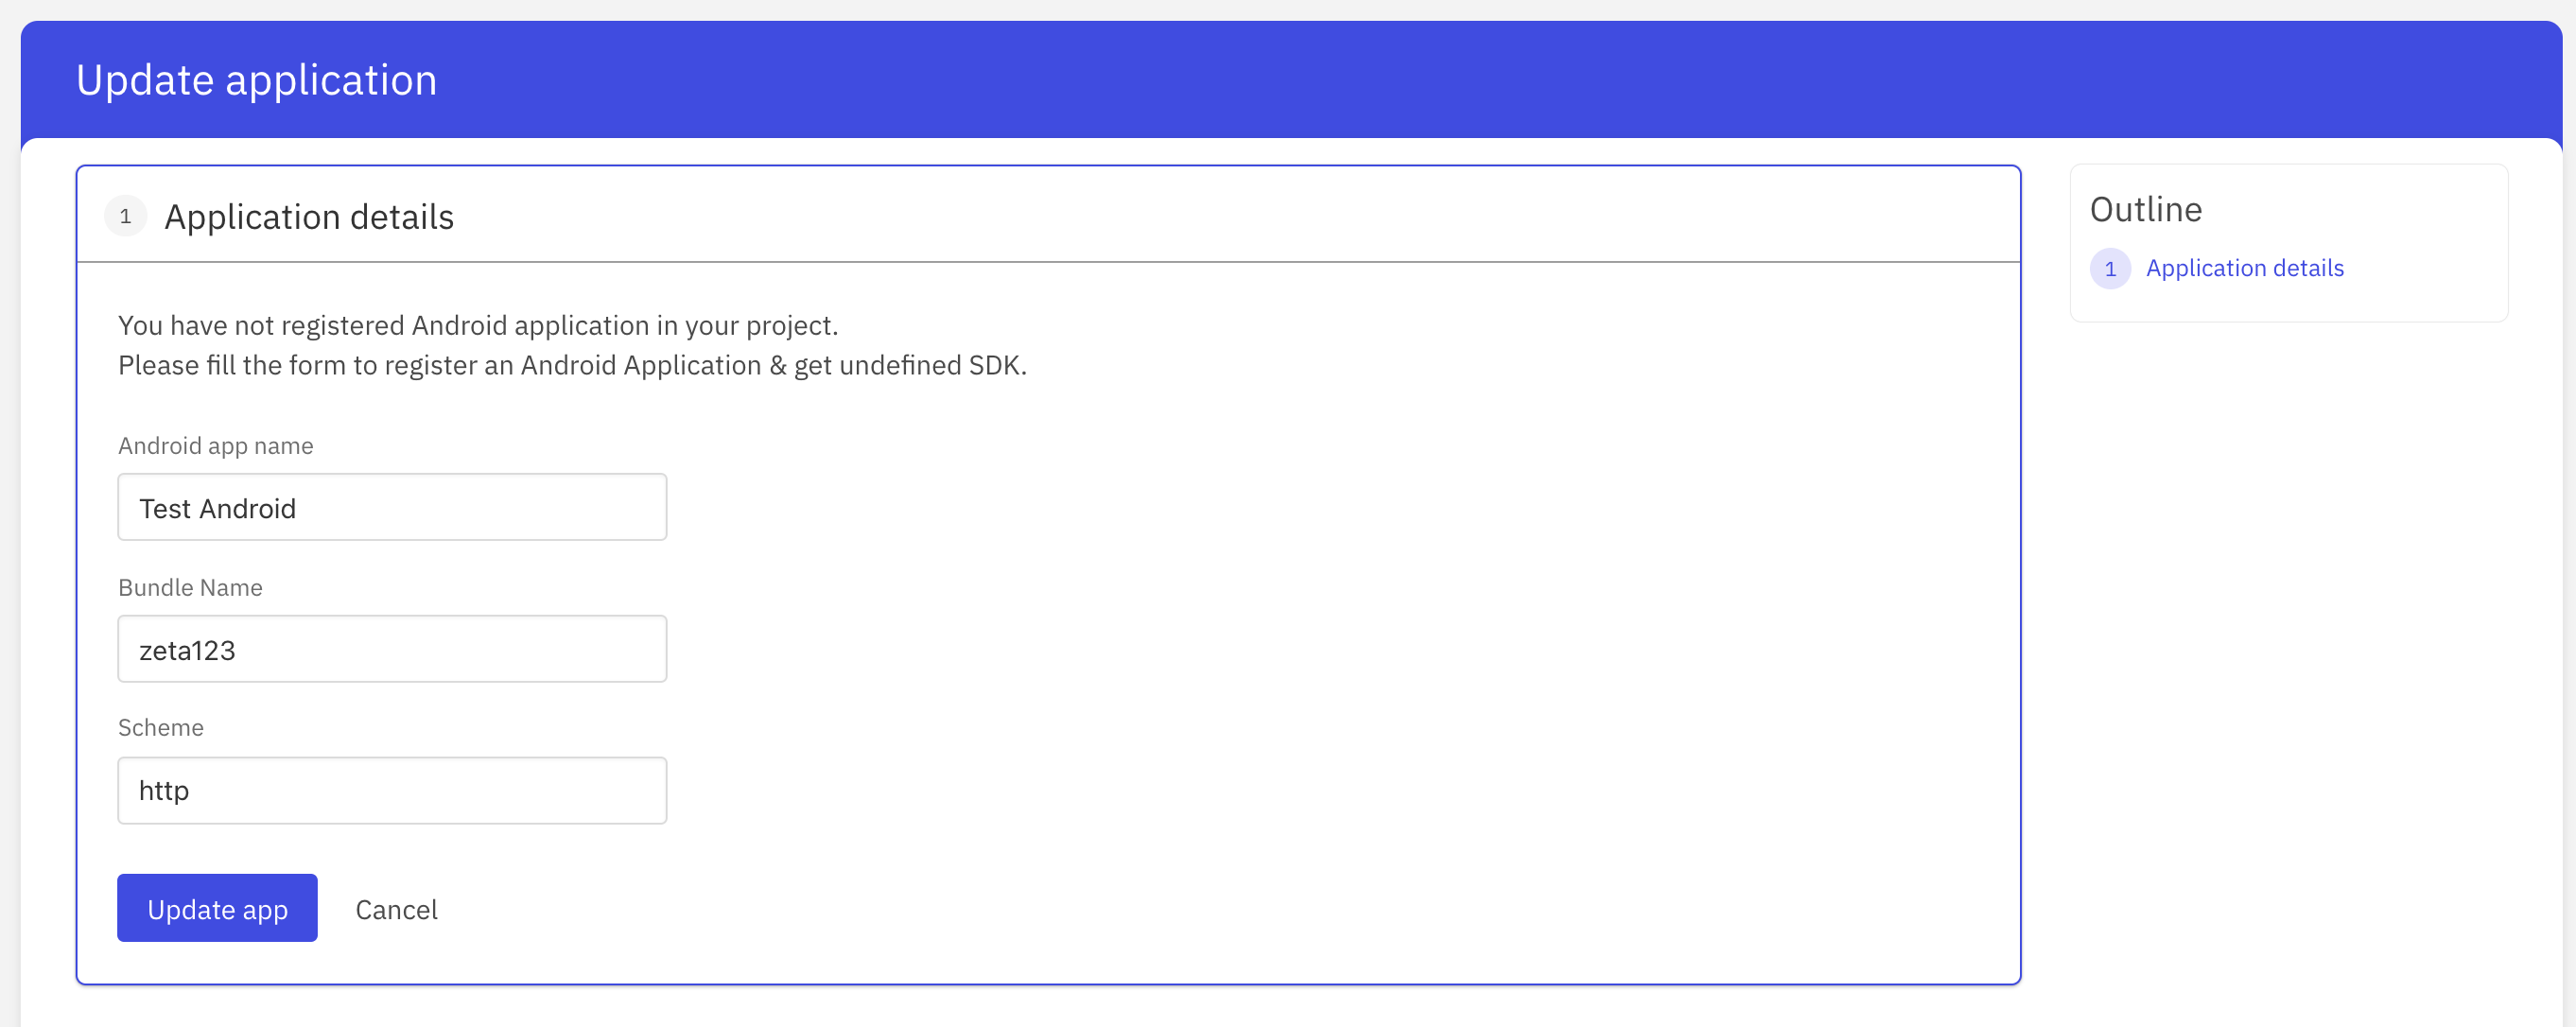
In order to register an application, the following details are required:
- Application name - The name of your application
- Bundle Name - A bundle ID otherwise known as a package in Android is the unique identifier for all Android apps. It needs to be unique as when you upload it to Google Play it identifies and publishes your app using the package name as the unique app identification.
- Scheme - Allows you to register your app for a URI (uniform resource identifier) in the operating system for a specific device once the app is installed. A URI can be any string without special characters, such as HTTP, zeta or myapp.
Step 3: Adding the SDK #
We host all our SDKs on a remotely accessible
Maven Repositry. Gradle understands the semantics of a maven repository and can download the SDK artifacts (
aar files ) from a remotely hosted maven repository.
To add the SDK to your project, follow these steps:
- Add the following rule to your project-level gradle file. This downloads the Maven repository which holds all the build artifacts and dependencies necessary for your project.
Note: To get the gradle credentials, you can request it from the support team.
We never recommend using credentials here as a plain text. So we are save this to the system variable as below.
For Mac #
- Find the path to .bash_profile by using:

 Switch Theme
 Expand More
 Copy
Copy
~/.bash-profile

nano ./bashrc
Code Copied
 For zsh terminal use below command to edit the variable
Switch Theme
Expand More
Copy
nano ~/.profile

nano ./zshrc-
Open the .bash_profile file with a text editor of your choice.
-
Scroll down to the end of the .bash_profile file.
-
Use the export command to add new environment variables:
export APOLLO_MAVEN_READ_USER="username”
export APOLLO_MAVEN_REPO_READ_USER_PWD="password”
-
Save any changes you made to the .bash_profile file.
-
Execute the new .bash_profile by either restarting the terminal window or using:
For Ubuntu #
1.In the terminal, run this command : gedit .bashrc
2.Add below values
export APOLLO_MAVEN_READ_USER="username”
export APOLLO_MAVEN_REPO_READ_USER_PWD="password”
3.Save & Exit
Switch Theme
Expand More
Copy
allprojects {
            repositories {
                ....
                maven {
                    credentials  {
                        username = "<username>"
                        password = "<password>"
                    }
                    url 'https://apollo-sdk.zetaapps.in/repository/maven-releases/'
                    authentication {
                        basic(BasicAuthentication)
                    }
                }
                maven {
                    credentials  {
                        username = "<username>"
                        password = "<password>"
                    }
                    url 'https://apollo-sdk.zetaapps.in/repository/maven-snapshots/'
                    authentication {
                        basic(BasicAuthentication)
                    }
                }
                ....
            }
        }
        configurations.all {
            // Add this if you face issue related to rxjava2
            resolutionStrategy.force "io.reactivex.rxjava2:rxandroid:2.1.0"
            }
}2. To your module (app-level) Gradle file (usually app/build.gradle), add the dependency for the cipher 3DS SDK
Switch Theme
Expand More
Copy
dependencies {
    implementation 'in.zeta.apollo:cipher:<latest-version>'
}- Add kotlin jVM target to your if you are using Kotlin as your programming language
Switch Theme
Expand More
Copy
android {
  kotlin_options = {   jvmTarget = "1.8"      }
}- (Optional) Custom packaging options if you face issues with packaging:
Switch Theme
Expand More
Copy
android {
            packagingOptions {
                exclude 'META-INF/library_release.kotlin_module'
                exclude 'META-INF/DEPENDENCIES'
            }
}Add permissions to your AndroidManifest.xml #
Add the following permissions in your app’s AndroidManifest.xml.
Switch Theme
Expand More
Copy
<uses-permission android:name="android.permission.INTERNET"/>
<uses-permission android:name="android.permission.ACCESS_NETWORK_STATE" />
<uses-permission android:name="android.permission.ACCESS_WIFI_STATE" />Cipher SDK uses these permissions to get the network state and take actions accordingly.
Add the config json file to your project #
Add the cipher.json file received from Zeta to the app/src/main/assets folder. A sample file looks like this
Switch Theme
Expand More
Copy
{
	"tenantId": <tenantId>,
	"projectId": <projectId>,
	"appId": "<appId>",
	"sdkName": "<sdkName>",
	"platform": "android",
	"sdkVersion": "<latestSdkVersion>",
	"sdkConfigVersion": "<configVersion>",
	"sdkConfigCollectionId": "<sdkConfigCollectionId>",
	"sdkConfigItemId": "<sdkCOnfigItem>",
	"authId": "<authId>",
	"apiKey": "<apiKey>",
	"sdkAuthBaseUrl": "<baseUrl>",
	"omsBaseUrl": "<baseUrl>",
	"apolloUserBaseUrl": "<baseUrl>",
	"ifiTenantId": <ifiTenantId>
}Note: The above file is only a sample. You should get the file for your app from Zeta.
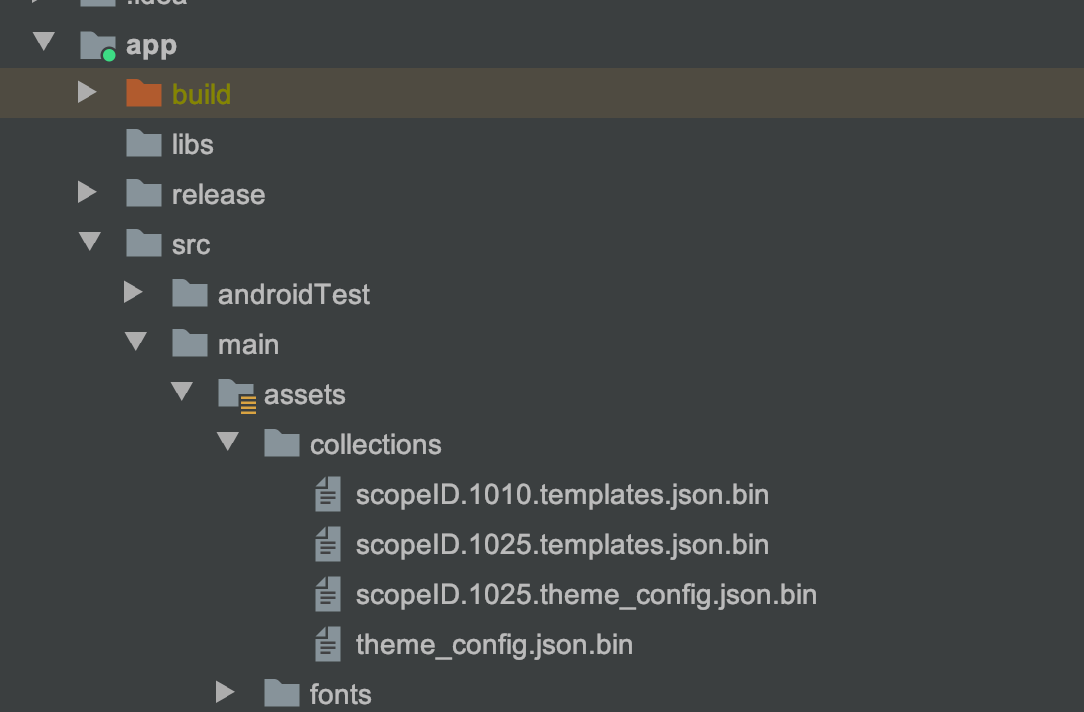
Step 4: Adding theme and template files #
Cipher 3DS SDK provides you with the capability to define the theme and layout used by the SDK. These can be edited remotely so you won’t have to ship a new app build for changing how your view looks. To deal with first-time initializations, it’s preferable to ship a local copy of files defining these with your app. You will receive files of format scopeID.
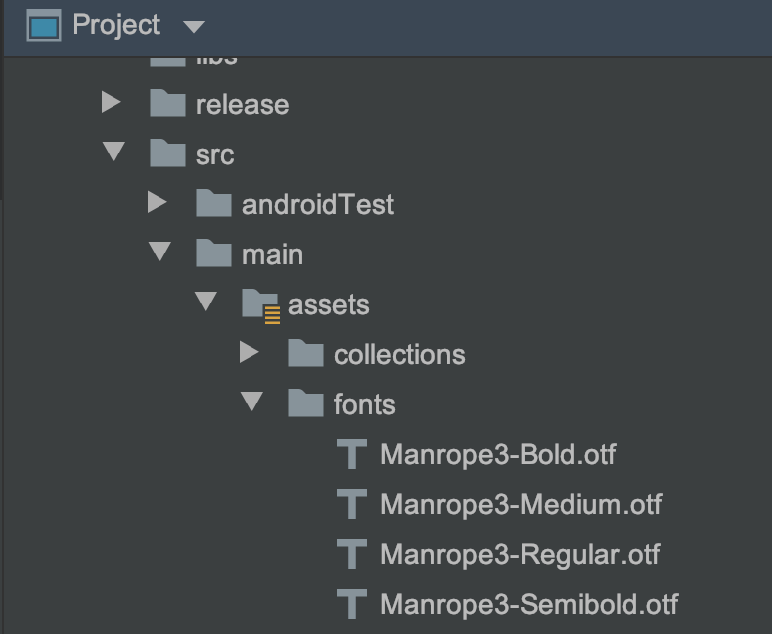
Step 5: Add the font files to your project #
To use the fonts the same as your app and give the user a similar experience, you should add your font files in the app/src/main/assets/fonts folder of your project. You can provide font files in either ttf or otf formats. Font files once added would like as follows with the Project view in Android Studio:
Step 6: Setting up SDK #
Set Up #
Once you complete the above steps, you are now ready to create an instance of CipherService. Add the following code to your app’s Application class (Create one if you haven’t yet). Inside your Application class, add the following code.
Switch Theme
Expand More
Copy
private static final String MANROPE3_REGULAR_FONT_PATH = "fonts/Manrope3-Regular.otf";
private static final String MANROPE3_MEDIUM_FONT_PATH = "fonts/Manrope3-Medium.otf";
private static final String MANROPE3_SEMI_BOLD_FONT_PATH = "fonts/Manrope3-Semibold.otf";
private static final String MANROPE3_BOLD_FONT_PATH = "fonts/Manrope3-Bold.otf";

private static final Map<String, String> fontMap = new HashMap<>();

static {
    fontMap.put("Manrope3-Regular".toLowerCase(), MANROPE3_REGULAR_FONT_PATH); fontMap.put("Manrope3-Medium".toLowerCase(), MANROPE3_MEDIUM_FONT_PATH);   fontMap.put("Manrope3-Semibold".toLowerCase(), MANROPE3_SEMI_BOLD_FONT_PATH); fontMap.put("Manrope3-Bold".toLowerCase(), MANROPE3_BOLD_FONT_PATH);
}

@Override
public void onCreate() {
    super.onCreate();
    setupCipherSdk();
}

private void setupCipherSdk() {
    cipherService = new CipherBuilder(this)
                .setNotificationIcon(R.drawable.ic_stat_adb)
                .setAppDisplayName(R.string.display_name)
                .setFontMap(fontMap)
                .disableSwipeSyncOnForeground() // Optional
                .disableSwipeSyncOnLaunch() // Optional
                .setTenantSecuredStoreAccess(securedStoreAccess) // Optional
                .useDoor() // Optional
                .build();
}Note
- If you are using Timber for logging, please initialize it after this step.
Following is the description of each of the builder methods
setAppDisplayName
Pass the string resource for your application name. We use this to show over the device lock screen when asked for user authentication.
Note: This is a necessary field. An exception is thrown if this is not provided.
setNotificationIcon
Pass your notification icon as a drawable resource to this method. This is used by the SDK to set the notification icon when showing Swipe2Pay notification.
Note: This is a necessary field. An exception is thrown if this is not provided.
setFontMap
Create a font map and set it to the builder. The cipher SDK will, then, use the mentioned fonts while rendering the views offered by the SDK. The file names here refer to the files that you had put inside the assets folder.
disableSwipeSyncOnForeground
Set this in the builder if you want to disable syncing of any pending Swipe2Pay notifications when the app comes from background to foreground.
disableSwipeSyncOnLaunch
Set this in the builder if you want to disable syncing of any pending Swipe2Pay notifications when you create the instance of CipherService.
useDoor
Cipher 3DS SDK provides two options for interacting with the internal platform APIs. One is with standard REST API calls; other is using a two-way TCP connection which we call as door connection. Set this method in the builder to use door as the API gateway for platform APIs.
setTenantSecuredStoreAccess
Cipher SDK maintains various sensitive pieces for information (for various purposes like storing spuerPin secrets, etc). This sensitive information is stored in the secured store.
Cipher SDK can support either of the below secure store implementations:
- SDK’s implementation
- Hosting app’s custom implementation
Cipher SDK implementation #
Cipher SDK provides an implementation of the secured store out of the box. The SDK provided secured store supports
-
Device lock
-
An SDK pin
This is used by default when you have not enabled access to your custom secured store and the device lock is also disabled. In this case we prompt the user to set up the SDK PIN for securing sensitive data. In this case all sensitive data is managed by SDK itself.
Note: To use this, you should use setParentActivityForAuth before accessing the sensitive actions of accessing SuperPin and Swipe2Pay.
Hosting app’s custom implementation #
If you want your custom secure store, use setTenantSecuredStoreAccess API when creating the CipherService instance using CipherBuilder. You should provide an implementation for SecureStore. This interface enables the Cipher SDK to securely store/retrieve sensitive data into your secure store.
Added in v2.0.1 #
Switch Theme
Expand More
Copy
public interface SecureStore {

   void storeData(@NonNull String var1, @NonNull String var2, @NonNull SecureStore.SecureStoreOperationListener var3);

   boolean containsData(@NonNull String var1);

   void getData(@NonNull String var1, @NonNull SecureStore.SecureStoreOperationListener var2);

   void removeData(@NonNull String var1, @NonNull SecureStore.SecureStoreOperationListener var2);

   void shutDownSecureStore();

   boolean isStoreAuthenticated();

   public interface SecureStoreOperationListener {
       void onSuccess(@Nullable String var1);

       void onFailure(Exception var1);

       String getIdentifier();
 }

}Added in 1.1.5 #
Switch Theme
Expand More
Copy
private EncryptedStoreService.AppSecuredStoreAccess securedStoreAccess = new EncryptedStoreService.AppSecuredStoreAccess() {

    @Override
    public void setDataInSecureStore(@NonNull String s, byte[] bytes, @NonNull SetaDataInSecureStoreListener listener) {
        store.putString(s, Base64.encodeToString(bytes, Base64.NO_WRAP));
        listener.done(true, null);
    }

    @Override
    public void getDataFromSecureStore(@NonNull String s, @NonNull GetDataInSecureStore listener) {
        listener.done(Base64.decode(store.getString(s), Base64.NO_WRAP), null);
    }

    @Override
    public boolean contains(@NonNull String s) {
        return store.contains(s);
    }

    @Override
    public void remove(@NonNull String s) {
        store.remove(s);
    }
};Step 5: Integrating SDK flows #
Cipher SDK is a stateful SDK. Before you start using the Swipe2Pay feature of SDK, take care of the following:
Set up a Secured Store #
Setting up secured store - Use isSecureStoreSetupRequired to check if we need to execute this step. Call
setupSecuredStore(activity, listener) to setup the secured store.
Authentication Cipher SDK #
Why authenticate the Cipher SDK? #
Once your user has logged into your mobile app, you already have a session for the logged in user. Then why do you need to separately authenticate the Cipher SDK? This is needed to authenticate the user in the issuer’s domain. The logged in user is identified in your app domain. But this user is not identified in the issuer’s domain. The account holder ID is identified in the issuer’s domain. Through the process of SDK Authentication, you will authenticate your user in the issuer’s domain as an account holder ID.
You can authenticate the Cipher SDK by invoking the SDK’s registerSDK function. The function expects a JWT token referred to as tenantAuthToken in the subsequent discussion and a TUV (tenant unique vector). The tenantAuthToken contains the account holder ID in the issuer’s domain as “claim” of the JWT token. TUV is account holder ID in the issuer’s domain.
The tenantAuthToken needs to be computed in your backend as it needs sensitive information to create the token. The information used to generate the tenantAuthToken should never be compromised. More information on how to generate the tenantAuthToken can be found
here.
As and when your user is logged into the app, your app should fetch the tenantAuthToken from your backend service. This is a one time activity and can be clubbed with the login flow of the mobile app.
Inflight enrolment during SDK authentication (Added in v3.0.0) #
During SDK authentication if the TUV is not enrolled with Zeta, the inflight enrollment of the card takes place. For inflight enrollment of the card, the tenant needs to add additional claims in the JWT(tenantAuthToken) that is sent to the SDK. The additional claims are as follows:
Switch Theme
Expand More
Copy
{
    “encryptedOnboardingUserRequest”: <encryptedRequest>,
    "publicKey" : <publicKey>
}Validity of tenantAuthToken? #
**The validity of the tenantAuthToken can be kept the same as the validity of the logged in user of the mobile app.**
Once the mobile app has fetched the tenantAuthToken, it should initiate the SDK Authentication flow as suggested in the code snippet below. This is a one time activity and should be only done along with the login flow of the app.
- If you support multiple TUV support then follow this (added in v3.0.0)
Switch Theme
Expand More
Copy
final String tenantAuthToken = myBackendService.issueAuthToken(userInfo);

cipherService.registerSDK(tenantAuthToken, tuv);- If you do not support multiple TUV support then follow this (added in v1.1.5)
Switch Theme
Expand More
Copy
final String tenantAuthToken = myBackendService.issueAuthToken(userInfo);

cipherService.registerSDK(tenantAuthToken);Setting up Swipe2Pay #
We use Firebase Cloud Messaging (FCM) to deliver Swipe2Pay notifications to your app. You should setup a Firebase project for your app if you have not done that already. Here are the details on how to do this. Once you are done setting up the Firebase project for your app, please share your FCM server key with our team at Zeta. We will use your FCM server key to deliver notifications to your app from our server. Our team will share with you the senderId which you can use to identify the push sent by Zeta to your app. If you don’t receive a senderId, there is an alternate way to identify the Swipe2Pay push as mentioned in ‘Listen to Swipe2Pay Push’
Note: You app should have ‘Draw over other apps’ permission to show Swipe to Authenticate prompt over other apps or when your app is closed. Otherwise, you will be notified about the a Swipe to Authenticate request on the notification tray.
Syncing the push token #
You should override your onNewToken() inside your FirebaseMessagingService and call onPushTokenUpdated() whenever you receive an callback for the new push token. This helps us to keep the push token synced in our servers and ensure a hassle-free push experience. You can use the following code snippet.
Added in v1.1.5 #
Switch Theme
Expand More
Copy
override fun onNewToken(token: String) {
  cipherService.onPushTokenUpdated()
}Listen to Swipe2Pay Push (Added in v1.1.5) #
When you receive a push notification inside the overridden onMessageReceived() method of your FirebaseMessagingService, you should relay that RemoteMessage received to Cipher SDK if you receive the message from our senderID. You can use handleNotification() method to relay the push message object to the Cipher SDK. You can use the following code snippet
Switch Theme
Expand More
Copy
override fun onMessageReceived(remoteMessage: RemoteMessage) {
  if(<zeta_sender_id>.equals(remoteMessage.from)) {
    cipherService.handleNotification(remoteMessage)
  }
}
}Alternatively, you can also look for the key ‘acsRequestOTP’ in the data payload of the RemoteMessage. You can use the following code snippet
Switch Theme
Expand More
Copy
override fun onMessageReceived(remoteMessage: RemoteMessage) {
  if(remoteMessage.getData().containsKey("acsRequestOTP")) {
    cipherService.handleNotification(remoteMessage)
  }
}Enable swipe to authenticate (Added in v3.0.0) #
To enable swipe to authenticate for a tuv, call enableS2P API
Switch Theme
Expand More
Copy
cipherService.enableS2P(tuv, s2PStatusListener)Disable swipe to authenticate (Added in v3.0.0) #
To disable swipe to authenticate for a tuv, call disableS2P API
Switch Theme
Expand More
Copy
cipherService.disableS2P(tuv, getSuperPinListener)Check swipe to authenticate status (Added in v3.0.0) #
To check swipe to authenticate status for a tuv, call getSwipeToPayStatus API
Switch Theme
Expand More
Copy
cipherService.getSwipeToPayStatus(tuv, s2PStatusListener)Set tenant token provider #
To get tenantAccessToken from the client app in case its expired, you need to set tenant token provider
- If you support multiple TUV then follow this (Added in v3.0.0)
Switch Theme
Expand More
Copy
cipherService.setTenantTokenProvider(tuv, object: UserAuthManager.TenantTokenProvider() {

  override fun getAuthToken(@NonNull UserAuthManager.GetTokenListener getTokenListener) {
      getTokenListener.setAuthToken(<tenantAccessToken>)
  }

})- If you do not support multiple TUV then follow this (Added in v2.0.1)
Switch Theme
Expand More
Copy
cipherService.setTenantTokenProvider(object: UserAuthManager.TenantTokenProvider() {
    @Override
    public void getAuthToken(@NonNull UserAuthManager.GetTokenListener getTokenListener) {
        getTokenListener.setAuthToken(authToken);
    }
});Soft Logout #
- If you do not support multiple TUV then follow this (Added in v1.1.5)
cipherService.logout(logoutListener) - Please ensure to call this API in events (like when switching the user, etc) of logouts in your app. This invalidates the authentication session being used locally and ensures that the latest provided tenantAuthToken is used to setup the next authentication session.
- If you support Multiple Tuv then follow this (Added in v3.0.0)
cipherService.logout(tuv: String,listener: LogoutListener) - Please ensure to call this api if you want to logout any specific Tuv.
cipherService.logoutAll(listener: LogoutListener) - Please ensure to call this api if you want to logout all Tuv’s.
Cipher SDK - API Reference #
Cipher SDK provides a set of public APIs which can be used to setup the SDK and access the functionalities provided by the SDK
Added in v1.1.5 #
fun isSecureStoreSetupRequired(): Boolean
This tells if the SDK needs a secure store setup. You can invoke setupSecureStore() to set up the secure store. It is only after this step that the SDK would be able to set up the Swipe2Pay and SuperPin
fun setupSecuredStore(activity: Activity, listener: SecureStoreSetupListener)
The method call to trigger setup of secure storage. Call this only when isSecureStoreSetupRequired returns true. If this returns an exception in the listener, please call logout() before retrying.
fun initialize(listener: InitializeSDKListener)
Call this method to trigger setup of the SDK. Call this only if when cipherService.isSuperPinSetupDone() return false. Please contact Zeta support in case this fails and the issue persists. Call this method when you do not support multiple Tuv.
fun registerSDK(clientJwtToken: String, tuv : String)
Method to authenticate a tenant user by providing a tenantAuthToken and tuv to the SDK. Call this method only when you do not support multiple Tuv. An ideal practice is to call this method (with updated tenantAuthToken) with every launch of the app.
fun setParentActivityForAuth(activity: Activity)
Set the parent activity on top of which we want to show the pin or device lock. This option should be used when the secured store is setup using the SDK’s implementation.
fun handleNotification(remoteMessage: RemoteMessage)
Method to communicate the notification data payload to the Cipher SDK. Look at
this section to understand how to identity the push being sent by Zeta.
fun onPushTokenUpdated()
Please ensure that you call this method on every update of the firebase push token. You can refer
here for more details.
fun logout(listener: LogoutListener)
Use this method to reset the SDK whenever you need to perform a logout for the user in the app.
fun refreshPendingSwipeRequests(listener: RefreshSwipeRequestsListener)
In case you want to sync any pending Swipe2Pay notifications inside the app, call this method. This can be used in scenarios where you want to build a UI where user can click on a button and sync the pending Swipe2Pay push.
Added in v3.0.0 #
fun setupSDK(tuv : String, listener: SdkSetupListener)
Call this method to trigger setup of the SDK. Call this only if when cipherService.isSetupDone(tuv: String) return false. Please contact Zeta support in case this fails and the issue persists. Call this method only when you support multiple Tuv.
fun registerSDK(clientJwtToken: String, tuv : String)
Method to authenticate a tenant user by providing a tenantAuthToken and tuv to the SDK. Call this method only when you support multiple Tuv.
Note:
- When you call
cipherService.registerSDK(clientJwtToken: String, tuv : String)API Cipher SDK creates an authentication session with its servers with a given expiry time. To ensure that this session gets regularly refreshed, an ideal practice is to call this method (with updated tenantAuthToken) with every launch of the app.
fun logout(tuv: String,listener: LogoutListener) - Please ensure to call this api if you want to logout any specific Tuv.
fun logoutAll(listener: LogoutListener) - Please ensure to call this api if you want to logout all Tuv’s.
Exceptions and error codes #
All the exception thrown will have the following fields in addition to the message
-
code - The error code related to the response
-
traceId - The trace id which can be provided to Zeta support for identifying the root cause
-
errorType - The type of error. (Added for verbosity)
There are two kinds of exception that cipher SDK can throw
-
SdkAuthException
-
CipherException
Note: All the exception classes extend the ApolloException
Standard Error Codes #
SDKAUTH_ERR_001 - Authentication of tenantAuthToken fails. Potential reasons
-
Token was signed with incorrect private key
-
Token does not have the configured claim
-
Token is expired
SDKAUTH_ERR_002 - Internal error caused while trying to authenticate the user. Contact support if the issue persists.
ERR_001 - Exception thrown due to bad request formation
ERR_002 - Internal server error. Contact support if the issue persists
ERR_003 - Internal SDK error. You can try logging out or contact support if the issue persists
CIPHERSDK_ERR_001 - When the use cancelled the secure store setup process.
Note: There will be other error codes that will be thrown from the SDK with appropriate message
Sample error response #
Switch Theme
Expand More
Copy
apollo@console$ in.zeta.apollo.sdkauth.SdkAuthException: The tenantAuthToken token set seems invalid. Please check the parameters and signature to create the token

SdkAuthException.code: SDKAUTH_ERR_001